Introduction
CMS (Contents Management System) such as Media Wiki and Word Press are platforms that are used in various scenes. For their production operation, it is necessary to set up a server such as Apache and a database such as Postresql, but XAMPP and MAMP can be used as a simple start-up.
XAMPP is a package of free software necessary to run web applications and is provided by apachefriends.org. The package includes Apache (web server), MariaDB (SQL database server; MySQL in the previous version), the web programming language PHP, Perl (used for the same purpose), administration tools such as phpMyAdmin, and some auxiliary software such as SQLite. It also includes several ancillary software and library modules, such as SQLite. Currently, it will be available for Windows, Linux, macOS, and Solaris.
MAMP is derived from the names of the system’s components: macOS (operating system); Apache (web server); MySQL or MariaDB (database management system); and PHP, Perl, or Python (programming languages used for web development). (programming languages used for web development).
In this article, I will describe how to set up MAMP and Mediawiki (WordPress).
I used web-eaters’ and Qiita’s articles as references, as well as those that do not use MAMP.
Note that the following procedure may not work in a Windows environment. In this case it is better to use XAMPP, which is an all-in-one tool similar to MAMP.
Launching MAMP
The first step is to download the MAMP installer for each OS from the MAMP website.
Next, open the installer and install (there are no special settings, so just approve the license and install).
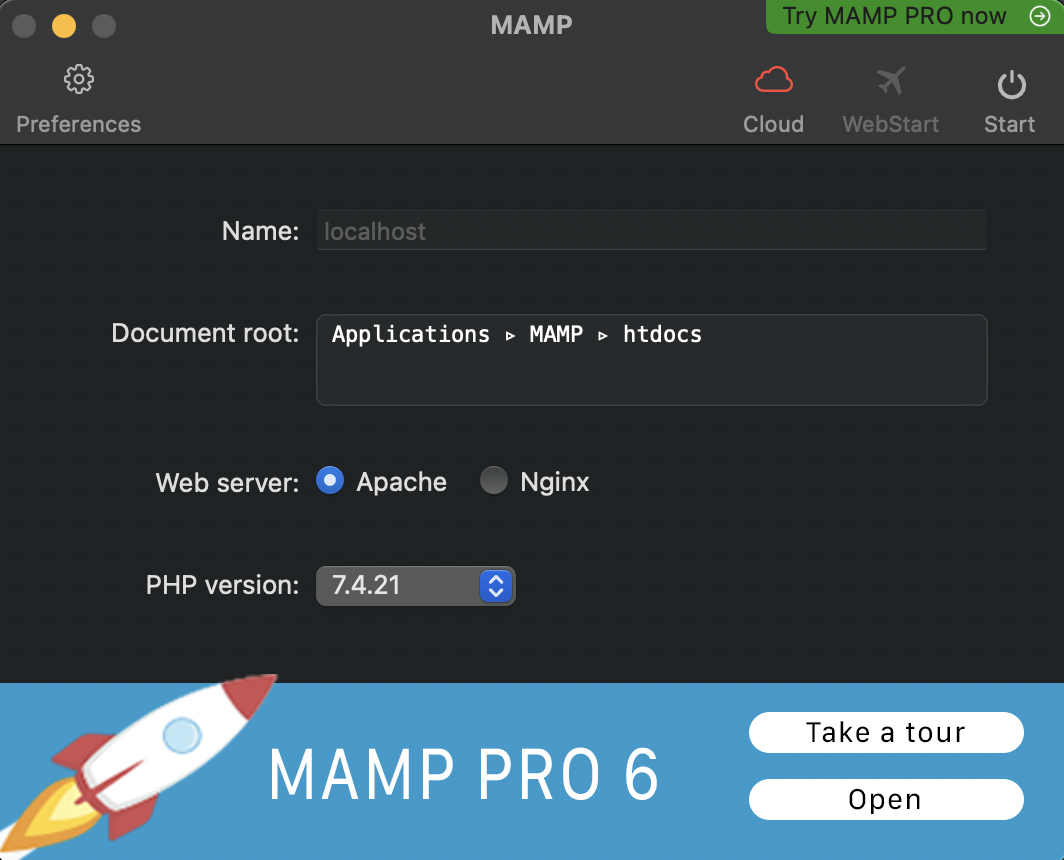
After the download is complete, launch the application and you will see the console as shown below.

Press the Start button in the upper right corner, and if it turns green after a while, the server (Apache) will start up, and your web browser will start up and you will see the following screen in your browser.

Next, install the MediaWiki or WordPress module.
In the case of MediaWiki, you can download the latest version from the download page, and in the case of WordPress, you can download it from the download page as well.
Once you have downloaded each module, unzip it, rename the file (for example, for MediaWiki, simply “mw”), find the “htdocs” folder in the MAMP folder you just installed (on a mac, in Applications, on a windows, in C disk, etc.), and store it there.
The next step is to configure MAMP to display PHP files in the browser. This is done in the “hosts” file. By setting up this hosts file, you can link an IP address to any URL.
The hosts file can be found on MAC by selecting Finder → “Move” on the menu bar → “Move Folder” → “/private/etc” and then “Move” → Find hosts file. (In the case of windows, it is located in “C:WindowsSystem32driversetchosts”)
The next step is to rewrite the hosts file. (On Windows, it is located in “C:WindowsSystem32driversetchosts”.) Next, we need to rewrite the hosts file. To rewrite the file, you need permissions, so if you are using a MAC, open a terminal and type “sudo vi privetxhosts”. Then the hosts file will appear in the terminal.
vi here is a test editor used in the unix environment. You can find detailed instructions in the following links.
This time, we just need to type and save. First of all, to enter the input mode, press “i” on the keyboard to enter the input mode with the word “INSERT” appearing below. Then add “127.0.0.1 mw.localhost” to the file using the name of the “mw” folder that you just stored in the “htdocs” folder.
After rewriting the file, exit the input mode by pressing “control-C” and save the file by typing “:wq”.
If you are using windows, open Notepad with administrator privileges and click on “Windows Button → Windows Accessories → Left click on Notepad → Other → Run as administrator”, then enter the data in the same way and save it.
(You don’t need to do anything else from here on, you can go on to start up Mediawiki.) Here, you need to set up “vhost (virtual host)” to handle two or more websites such as mediawiki and wordpress. To do this, we need to configure Apache’s httpd.conf.
httpd.conf is like the parent file of httpd-vhosts.conf. In the initial state of MAMP, this httpd-vhosts.conf is not enabled, so we will configure it so that it is reflected.
The httpd.conf file is located in “Application/MAMP/conf/apache/httpd.conf” for MAC. (For windows, it is located in “C:MAMP/bin/apache/conf/httpd.conf”)
Here, near line 600 of the httpd.conf file, you will find the code “#Include conf/extra/httpd-vhosts.conf” (or “#Include /Applications/MAMP/conf/apache/extra/httpd- vhosts.conf”) and take out the “#” (comment it out so that it can be executed)
httpd-vhosts.conf is located under the MAMP folder: “/Applications/MAMP/conf/apache/extra/httpd-vhosts.conf” for MAC, “C:MAMP/bin/apache/” for Windows conf/extra/httpd-vhosts.conf” for Windows.
Open them in a text editor and add the following code.
#【Mac Case】
# mw.localhost
<VirtualHost *:8888>
    DocumentRoot "/Applications/MAMP/htdocs/mw"
    ServerName mw.localhost
</VirtualHost>

#【Windows Case】
# mw.localhost
<VirtualHost *:8888>
    DocumentRoot "C:MAMPhtdocsmw"
    ServerName mw.localhost
</VirtualHost>
This completes the MAMP setup for the moment.
Launching MediaWiki
Next, we will discuss the installation and start-up of Mediawiki.
First, click on the link “2.MediaWiki (direct link to download the stable release version)…” in the middle of the page on the Mediawiki installation page. and extract the “mediawiki-xxxx.tar.gz” file that will be downloaded, change the file name to “mw” as set above (if you want to change the file name, re-set the above file), and place the file in the htdoc folder in the application folder generated by MAMP.
Start MAMP. (Press the “start” button.) If everything is set up well, the MAMP start screen will appear again, and press the “My Website” button at the top to start Mediawiki.

First, specify the language

Press “Continue”.
The next step is to configure the database connection.

Here, leave “MySQL” specified as the database, and as for the user name and password to be entered, enter “root” and “root” that appear when you open the “MySQL” tab in MAMP.

In addition, the database settings should be as follows

If you continue, you will be prompted for the name of the wiki and the administrator settings (the administrator name should be admin and the password admin, for example. The email address can be anything you like)

If you continue the installation without making any changes, you will see the following screen at the end.

Here, the LocalSettings.php file will be automatically generated and downloaded. (If the file does not download, click the Download button)
Store the downloaded LocalSettings.php file in the mediawiki folder (“mw”) in MAMP’s “htdocs” folder, and Mediawiki is up and running.
From now on, Mediawiki configuration is done in this “LocalSettings.php” file.
Mediawiki comes with a variety of extensions that can be added to extend its functionality. extensions are easy to use: download the extension module, store it in the “extensions” folder, and add it to the “LocalSettings.php” file. After downloading the extension module, store it in the “extensions” folder and add the configuration code to the “LocalSettings.php” file.
The “extensions” folder contains various things by default, for example, the “visual editor” that simplifies wiki editing is already stored, so you just need to add “wfLoadExtension( );” to the “LocalSettings.php” file, and restart MAMP to use it.
To edit MediaWiki, click the “Edit” button at the top, and you can enter text as if you were using a regular text editor. There are several ways to create a new link page, but one way is to enter text in the editor (e.g. Link 1), select the text you have entered, and press the “Link button” to open the page where you can enter the information for the page you want to link to (this will become the page name), create the link, and save your edits. The link will be generated.
Further details on how to use mediawiki will be given separately.

コメント